


Hello reader!
Welcome to part 1 of my HTML5 build series.
We will start off with creating a scene management system in JavaScript.
If you haven’t read my introduction about these episodes yet, feel free to read it here: https://justinbieshaar.com/2019/04/06/build-series-introduction/
What is scene management?
Scene management is a render system rendering groups. For example: Menu group with buttons to show settings and login information and Game group with game mechanics and visualizations.
Each group is called a scene. Each scene can trigger its own functionalities and visualizations but can also be shared between scenes. We store the scenes in a scene manager to have control of which scene we want to show, hide or even delete.
Let’s start
To start we need to create an application. In order to create an application we should create some files first. Let’s start with creating an folder.
Create a folder in any location you prefer. When created a folder create a file called index.html and main.js.
For index.html we going to create a really simple and default html script. We will only use index.html to import JavaScript files.
<html>
<head>
	<meta charset="UTF-8">
	<title>Build series HTML5</title>
	<script src="https://pixijs.download/release/pixi.min.js"></script>
</head>
<body>
	<!---- Launcher --->
	<script src="main.js"/></script>

</body>
</html>
This is the start of our HTML5 game series!
We’ve now imported PixiJS 5.0.0 from their download page on github (https://github.com/pixijs/pixi.js)
But we are not using the PixiJS library!
Creating a PixiJS application in main.js:
const renderer= new PIXI.Application({
    width: 800, height: 600, backgroundColor: 0x86e8af, resolution: window.devicePixelRatio || 1,
});
document.body.appendChild(renderer.view);
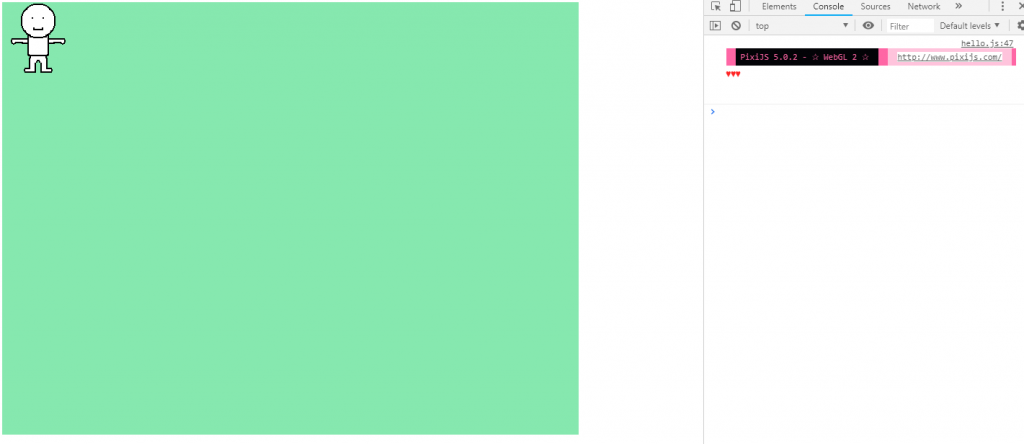
Now we’ve created our PixiJS application with a size of 800×600 and a soft green background color. You can test your application by pasting your index.html file location into your browser.
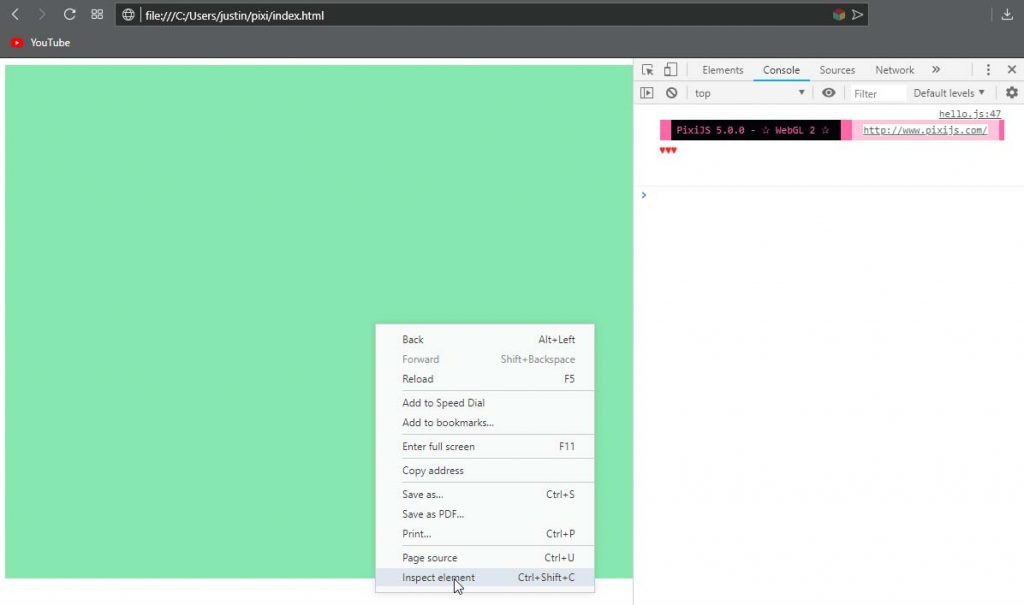
When you go to your console by going to Inspect element you’ll see PixiJS 5.0.0 has started! 😀
Let’s render!
First thing I did was digging into PixiJS examples page https://pixijs.io/examples. It is a really nice and clear page where you can play a bit with the code your self.
Let’s render an image in our just created application 🙂
const renderer= new PIXI.Application({
    width: 800, height: 600, backgroundColor: 0x86e8af, resolution: window.devicePixelRatio || 1,
});
document.body.appendChild(renderer.view);

//creating a container to draw our image in
const container = new PIXI.Container();
renderer.stage.addChild(container);

//creating a sprite
const player = PIXI.Sprite.from("assets/test_character.png");
container.addChild(player);
hmm.. if you are using Opera, Chrome or IE you’ll notice nothing happened..
For Firefox users everything should be okay!
Always when something did not happened as we expected we immediately open our inspector and go right to our console.
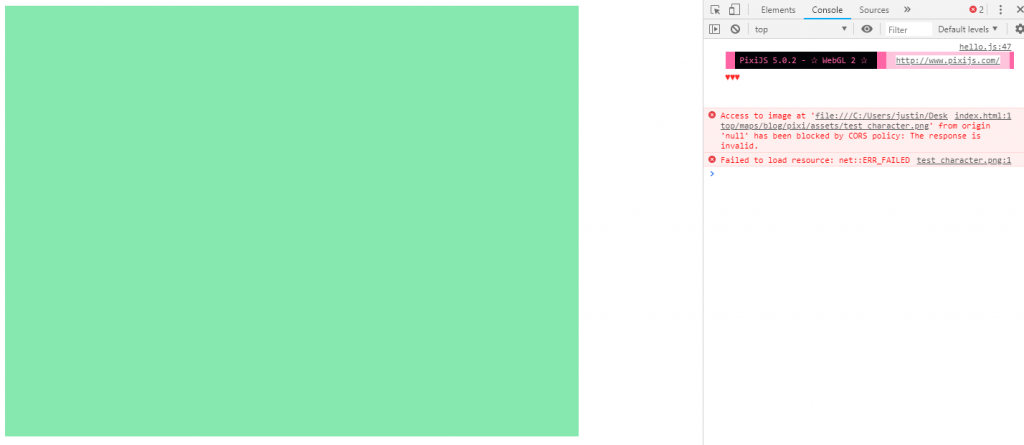
Huston! We’ve got a problem 😛
As we can reed we have an CORS issue. First thing I do is searching “from origin ‘null’ has been blocked by CORS policy: The response is invalid.” in google. First find was immediately useful for me. I came to this stack overflow link https://stackoverflow.com/questions/41965066/access-to-image-from-origin-null-has-been-blocked-by-cors-policy and read it is caused because we are hosting locally. The first answer suggest to use a AWS S3 browser to host our images.. But I think I’ve got a better idea.
First we need to download something called npm, using npm we can install some usefull modules to help us solving some problems or even adding some cool functionalities without having to reinvent the wheel again.
Download npm here: https://www.npmjs.com/get-npm
After you installed it open you command prompt and check if it is working correctly by typing ‘npm -v‘ [enter]
If it doesn’t work for you, please leave a comment below and I will help you.
Now we’ve got npm installed we can install our first package 😀
We will install http-server. This package will allow us to host locally like we are a http server. This way we will not have a CORS issue.
Install http-server by typing ‘npm install http-server -g‘ [enter]
https://www.npmjs.com/package/http-server
Now we can use the command ‘http-server‘ in our location folder to launch a http server locally.
But we programmers can make our lives lazy. So let’s make our quickest tool ever.
Create a new file called startHttpServer.bat
http-server
By adding .bat after our file name windows will recognize it as a batch file firing in the command prompt.
Put this file in your working directory and fire it up.
Now go to http://127.0.0.1:8080/.
Voila! we did it, we’ve now hosted a local http-server and have rendered an image in our application. 😀
(We also could have downloaded Firefox, but I am dedicated to Opera and maybe you as well or to Chrome)
Helpers
Now we’ve managed to draw something we can create some helpers to make our progress easier in the future.
First thing I added is a reference file.
This file will hold all locations and tags. This way if we ever want to change anything we only have to check reference.js to change it.
I made a new folder called helpers/ and added a new file called references.js
Reference file will look something like this:
//----- states
const GAMESTATE = 'game';
const MENUSTATE = 'menu';

//----- ui
const BUTTON_PINK_NORMAL = 'assets/button.png';
const BUTTON_PINK_PRESSED = 'assets/button_pressed.png';
const BUTTON_PINK_HOVER = 'assets/button_hover.png';

//----- test
const CHARACTER_TEST = 'assets/test_character.png';
Make sure you add this new class in our index.html as well! Otherwise we are not able to use it.
Index.html:
<html>
<head>
	<meta charset="UTF-8">
	<title>Build series HTML5</title>
	<script src="https://pixijs.download/release/pixi.min.js"></script>
	<!---- Adding references to our application --->
	<script src="helpers/references.js"/></script>
</head>
<body>
	<!---- Launcher --->
	<script src="main.js"/></script>

</body>
</html>
Now we can easily access our states and image locations!
Button
As you can see I’ve already added some button image references in our reference.js file. This because having a button can allow us to test the scene manager eventually.
At PixiJS example page you might already found the interaction tab and might also seen the interactivity example: https://pixijs.io/examples/#/interaction/interactivity.js.
I find it quite a lot of lines of code to put everywhere in our code.. So I made a helper class called Button in a new file button.js.
This class will handle, create and fire callbacks of a button.
I added button.js as a new file in /helpers folder.
button.js:
class Button {
    // initializing all data
    constructor(scene, normal, pressed, hover){
        var textureNormal = PIXI.Texture.from(normal);
        var texturePressed = PIXI.Texture.from(pressed);
        var textureHover = PIXI.Texture.from(hover);

        this.button = new PIXI.Sprite(textureNormal);
        this.button.interactive = true;
        this.button.buttonMode = true;

        this.text = new PIXI.Text(' ', {fontFamily : 'Arial', fontSize: 16, fill : 0xffffff, align : 'center'});

        this.text.anchor.set(0.5);
        this.button.anchor.set(0.5);

        this.setOnPointerDown(function(){
            this.isPressed = true;
            this.texture = texturePressed;
        });

        this.setOnPointerUp(function(){
            this.isPressed = false;
            if(this.isOver){
                this.texture = textureHover;
            } else {
                this.texture = textureNormal;
            }
        });

        this.setOnPointerOver(function (){
            this.isOver = true;
            if(this.isPressed){
                this.texture = texturePressed;
            } else {
                this.texture = textureHover;
            }
        });

        this.setOnPointerOut(function (){
            this.isOver = false;
            this.texture = textureNormal;
        });


        scene.addChild(this.button);
        scene.addChild(this.text);
    }

    setPosition(x, y){
        this.text.x = x;
        this.text.y = y;
        this.button.x = x;
        this.button.y = y;
    }

    setText(message){
        this.text.text = message;
    }

    setOnPointerDown(func){
        this.button.on('pointerdown', func);
    }

    setOnPointerUp(func){
        this.button.on('pointerup', func);
        this.button.on('pointerupoutside', func);
    }

    setOnPointerOver(func){
        this.button.on('pointerover', func);
    }

    setOnPointerOut(func){
        this.button.on('pointerout', func);
    }

    setOnPointerClick(func){
        this.button.on('pointertap', func);
    }
}
Button class has quite some features. In the constructor we will say to our button what it has to visualize when hovered, pressed and/or exited the button. It is really nice PixiJS already provided us with settings like .interactive and .buttonMode and .on(‘pointer events’,..) which also all can be found in their in depth documentation: http://pixijs.download/release/docs/PIXI.Sprite.html
In the constructor we add some pointer events to visualize local variables we create by our parameters. Scene parameter is an PIXI.Container but more about that will come shortly.
A button is nothing to me if it does not have a text (unless you put text in the sprites it self of course 😉 ). So, in the constructor we also generate an empty text which is adjustable by code after initialization. I choose to do it this way instead of by parameter since you might like to use an image with text in it.
Eventually we also have a function to set the position of our button which will set the position of our sprites and text.
Now let’s add button.js to our index.html:
<html>
<head>
	<meta charset="UTF-8">
	<title>Build series HTML5</title>
	<script src="https://pixijs.download/release/pixi.min.js"></script>
	<!---- Adding references and button to our application --->
	<script src="helpers/references.js"/></script>
	<script src="helpers/button.js"/></script>
</head>
<body>
	<!---- Launcher --->
	<script src="main.js"/></script>

</body>
</html>
Let’s test in main.js by adding:
const renderer= new PIXI.Application({
    width: 800, height: 600, backgroundColor: 0x86e8af, resolution: window.devicePixelRatio || 1,
});
document.body.appendChild(renderer.view);

//creating a container to draw our image in
const container = new PIXI.Container();
renderer.stage.addChild(container);

//creating Button
var button = new Button(container, BUTTON_PINK_NORMAL, BUTTON_PINK_PRESSED, BUTTON_PINK_HOVER);
button.setPosition(400, 100);
button.setText("test");
button.setOnPointerClick(function(){
        console.log("Hello world! I just pressed button in main.js!");
});
As you can see instead of re writing everything of button.js every time. We now can create a button with only 4 lines of code!
Now let’s test!

Nice! We have a button we can click and fire a callback! Let’s create the scene manager!
Scenes
Actually PIXI.Container is already a scene. We can add sprites to a container and visualize them by adding the container to our application. But what if we make a container with containers. Then we have a scene managing other scenes which will lead to scene management! Because if a scene can determine which scene it wants to render, it can be seen as a scene manager.
So, instead of creating a lot of PIXI.Container’s we can create classes to organize our containers.
Let’s create the first Container class called SceneManager. I made a new folder named scenes/ to create all my scene related files in.
Creating new file called: sceneManager.js
class SceneManager extends PIXI.Container {
    constructor(renderer){
        super();
        this.renderer = renderer;
        this.scenes = [];
        this.currentScene = null;

        this.lastDeltaTime = 0;
    }

    get scene(){
        return this.currentScene;
    }

    set scene(value){
        if(this.currentScene === value) {
            return;
        }
        this.currentScene = value;
        this.currentScene.manager = this;
        this.currentScene.position.set(this.renderer.width / 2, this.renderer.height / 2);
        this.addScene(this.currentScene);
        this.scene.initialize();

        // removing all scenes
        this.children.length = 0;

        // adding new set scene
        this.addChildAt(this.currentScene, 0);
    }

    update(delta){
        if(this.currentScene != null){
            this.currentScene.update(delta);
        }
    }

    renderScene(name){
        if(this.currentScene != null && this.currentScene.name === name){
            return;
        }
        this.scene = this.getSceneByName(name);

        // adding scene to application
        this.renderer.stage.addChild(this.scene);
    }

    addScene(scene){
        if(this.scenes.indexOf(scene) !== -1) {
            return this;
        }
        scene.manager = this;
        this.scenes.push(scene);
        return scene;
    }

    getSceneByName(name){
        let scene;
        for(let i = 0; i < this.scenes.length; i++){
            if(this.scenes[i].name === name){
                scene = this.scenes[i];
                break;
            }
        }
        return scene;
    }
}
Scene manager is now finished so let’s go through it a bit.
In the constructor we initialize the manager, we add the application (renderer) to manage the scenes to the renderer.
get/set scene will return and set our current scene. Set scene will remove the manager current active scene and replace it with a new scene. It will run through the scene’s full initialization.
update is made with an eye on the future. Update will be called every frame and so we are able to add some movement in our application in the future.
renderScene(name) will render the scene matching the name parameter. Name can also been seen as a tag or identifier of our Scene class (more about that shortly after this)
addScene(scene) will add a scene to the scenes array which will be checked in renderScene method
getSceneByName is used by renderScene to collect the matching scene set in addScene to render.
Not that complex right? 🙂
Let’s make the actual Scenes.
We will start off with two scenes: menu scene and game scene.
Both scenes will be inherent from Scene class.
In scenes/ folder I add three new files: scene.js, menu.js and game.js
scene.js:
class Scene extends PIXI.Container{
  constructor(name){
    super();
    this.name = name;
    this.manager = null;
  }

  update(delta){
  }

  initialize(){
  }
}
It’s quite empty but will change in the future. 😀
Currently we will only use it as identifier for our scenes.
menu.js:
class Menu extends Scene {
    constructor(){
        // setting name to identify this scene in scene manager
        super(MENUSTATE);
        this.button = null;
    }

    initialize(){
        console.log('activated menu');

        this.button = new Button(this, BUTTON_PINK_NORMAL, BUTTON_PINK_PRESSED, BUTTON_PINK_HOVER);
        this.button.setPosition(400, 100);
        this.button.setText("to game");
        this.button.setOnPointerClick(function(){
            sceneManager.renderScene(GAMESTATE);
        });
        super.initialize();
    }

    update(delta){
        super.update(delta);
    }
}
Menu scene will only have one button to move the user to the game scene.
game.js:
class Game extends Scene {
    constructor(){
        super(GAMESTATE);
        this.player = PIXI.Sprite.from(CHARACTER_TEST);
    }

    initialize(){
        console.log('activated game');

        this.player.anchor.set(0.5);
        this.player.x = 400;
        this.player.y = 100;
        this.addChild(this.player);

        this.button = new Button(this, BUTTON_PINK_NORMAL, BUTTON_PINK_PRESSED, BUTTON_PINK_HOVER);
        this.button.setPosition(60, 30);
        this.button.setText("back to menu");
        this.button.setOnPointerClick(function(){
            sceneManager.renderScene(MENUSTATE);
        });
        super.initialize();
    }

    update(delta){
        super.update(delta);
    }
}
In game scene we will add a back to menu button to test the functionality of cycling through scenes. We also add an image to check if everything will work as we want it to do.
Now let’s add the new files we’ve created to our index.html and test it!
index.html:
<html>
<head>
	<meta charset="UTF-8">
	<title>Build series HTML5</title>
	<script src="https://pixijs.download/release/pixi.min.js"></script>
	<!---- Adding references and button to our application --->
	<script src="helpers/references.js"/></script>
	<script src="helpers/button.js"/></script>

	<!---- adding scene management base to our application--->
	<script src="scenes/sceneManager.js"/></script>
	<script src="scenes/scene.js"/></script>
</head>
<body>
	<!---- scenes --->
	<script src="scenes/menu.js"/></script>
	<script src="scenes/game.js"/></script>
	<!---- Launcher --->
	<script src="main.js"/></script>

</body>
</html>
Now let’s add scene management to our main.js!
main.js:
const renderer= new PIXI.Application({
    width: 800, height: 600, backgroundColor: 0x86e8af, resolution: window.devicePixelRatio || 1,
});
document.body.appendChild(renderer.view);

// creating scene manager
var sceneManager = new SceneManager(renderer);

//creating and adding new scenes
sceneManager.addScene(new Menu());
sceneManager.addScene(new Game());

// render menu scene as default scene
sceneManager.renderScene(MENUSTATE);

// update scene manager which will render the active scene (this case menu scene by startup)
renderer.ticker.add(function update(delta){
    sceneManager.update(delta);
});
Fingers crossed!
It worked! 😀
We’ve now created scenes with functionalities! We are now able to add as many scenes as we want and create as many buttons as we want with minimal code requirements in main.js!
We can organize our scene functionalities in our scene classes and can edit visualizations easily by changing the path’s in our references file!
In case you missed something or you want to download all assets, feel free to visit the repository here: https://github.com/jscotty/html5_buildserie/tree/EP1_SceneManager
I hope you’ve enjoyed this episode! If you have any questions, feel free to ask in the comments or message me.
Greetings,
– Justin Scott
Justin
Hey there 🙂
Your wordpress site is very sleek – hope you
don’t mind me asking what theme you’re using? (and don’t mind if
I steal it? :P)
I just launched my site –also built in wordpress like yours– but the theme slows (!) the site
down quite a bit.
In case you have a minute, you can find it by searching for “royal cbd” on Google (would appreciate any
feedback) – it’s still in the works.
Keep up the good work– and hope you all take care of yourself
during the coronavirus scare!
Royal CBD
Hi, I would like to subscribe for this website to get most up-to-date updates,
thus where can i do it please help out.